Develop with Foundry
Use Foundry to develop and deploy smart contracts on GIWA.
Foundry is a toolkit useful for developing Ethereum applications. It's fast and modular. Once installed, Foundry provides four core developer tools listed below.
forge: Smart contract development, testing, deployment, and verificationanvil: Run a Local Ethereum Node with Network Forking for Developmentcast: Contract interaction, sending transactions, and querying chain datachisel: Solidity REPL for rapid prototyping and debugging
Set up development environment
Install Foundry.
curl -L https://foundry.paradigm.xyz | bash
foundryup
After installing the Foundry toolkit, you can use the forge command to create a new Solidity project.
forge init giwa_project
cd giwa_project
The generated giwa_project has the following structure.
giwa_project/
├── foundry.toml    # a file with project configurations
├── lib             # external libraries used in the project
├── script          # scripts for deployment / simulation
├── src             # project source code directory
└── test            # contract test directory
Writing a contract
Let’s start by writing a simple contract.
// SPDX-License-Identifier: MIT
pragma solidity ^0.8.28;

contract Giwa {
    event HelloGiwa();

    function helloGiwa() public {
        emit HelloGiwa();
    }
}
The code above defines a contract named Giwa, which includes a function called helloGiwa and an event called HelloGiwa.
As explained earlier, high-level Solidity code must be compiled into low-level bytecode before it can run on the EVM. Use the following command to compile the contract:
forge buildWriting tests
You can write tests to confirm the contract behaves as intended. With forge, you can write tests in Solidity.
// SPDX-License-Identifier: MIT
pragma solidity ^0.8.28;

import {Test} from "forge-std/Test.sol";
import {Giwa} from "../src/Giwa.sol";

contract GiwaTest is Test {
    Giwa public giwa;

    function setUp() public {
        giwa = new Giwa();
    }

    function test_helloGiwa() public {
        vm.expectEmit(true, true, true, true);
        emit Giwa.HelloGiwa();

        giwa.helloGiwa();
    }
}
To see the results, run the following:
forge testIf you see the output below, it means the test you wrote has passed successfully.
Ran 1 test for test/Giwa.t.sol:GiwaTest
[PASS] test_helloGiwa() (gas: 10198)
Suite result: ok. 1 passed; 0 failed; 0 skipped; finished in 349.71µs (67.58µs CPU time)

Ran 1 test suite in 118.78ms (349.71µs CPU time): 1 tests passed, 0 failed, 0 skipped (1 total tests)
Deploying the contract
With forge, you can write scripts in Solidity to interact with the chain or deploy contracts.
// SPDX-License-Identifier: MIT
pragma solidity ^0.8.28;

import {Script} from "forge-std/Script.sol";
import {Giwa} from "../src/Giwa.sol";

contract GiwaScript is Script {
    Giwa public giwa;

    function setUp() public {}

    function run() public {
        vm.startBroadcast();
        giwa = new Giwa();
        vm.stopBroadcast();
    }
}
To deploy the contract on-chain, set environment variables as follows.
GIWA_SEPOLIA_RPC_URL=https://sepolia-rpc.giwa.io
BLOCKSCOUT_API_URL=https://sepolia-explorer.giwa.io/api
You can import the wallet to use for deployment cast using the following command.
cast wallet import deployer --interactiveRun the script you wrote to perform the deployment. Execute the script like this:
source .env

forge script \
    script/Deploy.s.sol
    --account deployer \
    --rpc-url $GIWA_SEPOLIA_RPC_URL \
    --broadcast \
    --verify \
    --verifier blockscout \
    --verifier-url $BLOCKSCOUT_API_URL
If successful, you should see output like the following.
Script ran successfully.
## Setting up 1 EVM.
==========================
Chain 91342
Estimated gas price: 0.000000505 gwei
Estimated total gas used for script: 111632
Estimated amount required: 0.00000000005637416 ETH
==========================
##### 91342
✅ [Success] Hash: <tx-hash>
Contract Address: <your-contract-address>
Block: 19449984
Paid: 0.000000000021725363 ETH (85871 gas * 0.000000253 gwei)
✅ Sequence #1 on 91342 | Total Paid: 0.000000000021725363 ETH (85871 gas * avg 0.000000253 gwei)
==========================
ONCHAIN EXECUTION COMPLETE & SUCCESSFUL.
##
Start verification for (1) contracts
Start verifying contract `<your-contract-address>` deployed on 91342
EVM version: prague
Compiler version: 0.8.28
Submitting verification for [src/Giwa.sol:Giwa] <your-contract-address>.
Submitted contract for verification:
Response: `OK`
GUID: ``
URL: https://sepolia-explorer.giwa.io/address/<your-contract-address>
Contract verification status:
Response: `OK`
Details: `Pass - Verified`
Contract successfully verified
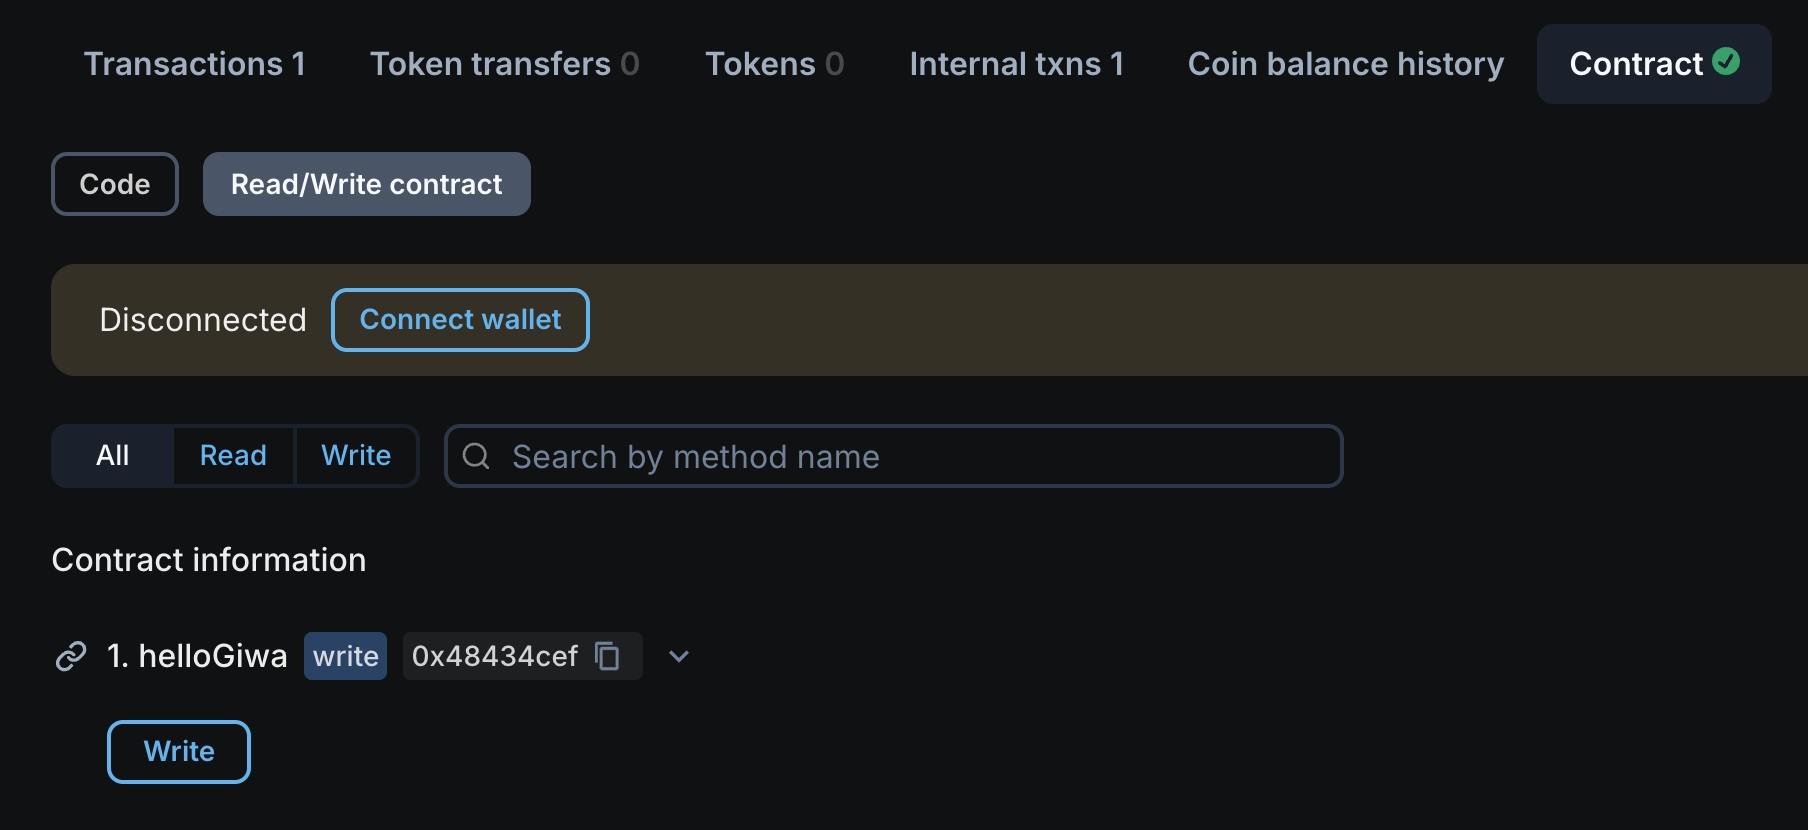
All (1) contracts were verified!From the output above, you can see the contract address and verify on the explorer that the contract was deployed successfully. Once deployed and verified, you can interact with it directly through the explorer UI.
Learn more
Read more guides in the Foundry Book.
Last updated