Develop with Hardhat
In this tutorial, you’ll go through the full process of developing, testing, deploying, and verifying smart contracts on the GIWA chain.
Requirements
Node v22+
This tutorial requires Node version 22 or higher to be installed.
Download Node v22+
If you use nvm to manage Node versions, run nvm install 22.
Set up development environment
Install Hardhat and create a project.
mkdir giwa-project
cd giwa-project

npx hardhat --init
npm install --save-dev @nomicfoundation/hardhat-verify
The generated project structure looks like the following.
giwa_project/
├── hardhat.config.ts # project configurations
├── contracts         # project source code directory
├── test              # contract test directory
├── ignition          # Hardhat Ignition deployment script
└── scripts           # scripts for deployment / simulation
Connecting Hardhat to the GIWA chain
To deploy smart contracts to the GIWA chain, add GIWA chain to hardhat.config.ts.
import type { HardhatUserConfig } from "hardhat/config";

import hardhatToolboxViemPlugin from "@nomicfoundation/hardhat-toolbox-viem";
import hardhatVerify from "@nomicfoundation/hardhat-verify";
import 'dotenv/config'

const config: HardhatUserConfig = {
  plugins: [hardhatToolboxViemPlugin, hardhatVerify],
  solidity: {
    profiles: {
      default: {
        version: "0.8.28",
      },
      production: {
        version: "0.8.28",
        settings: {
          optimizer: {
            enabled: true,
            runs: 200,
          },
        },
      },
    },
  },
  networks: {
    giwaSepolia: {
      type: "http",
      chainType: "op",
      url: "https://sepolia-rpc.giwa.io",
      accounts: [process.env.PRIVATE_KEY as string]
    },
  },
  chainDescriptors: {
    91342: {
      name: "Giwa Sepolia",
      blockExplorers: {
        blockscout: {
          name: "Giwa Sepolia Explorer",
          url: "https://sepolia-explorer.giwa.io",
          apiUrl: "https://sepolia-explorer.giwa.io/api",
        },
      },
    },
  },
};

export default config;
Loading environment variables
The above configuration reads PRIVATE_KEY environment variable defined in .env file using dotenv. NEVER hard-code private keys in source code.
To install dotenv, run:
npm install --save dotenvOnce dotenv is installed, create .env file and fill it with like below.
PRIVATE_KEY=<YOUR_PRIVATE_KEY>Replace <YOUR_PRIVATE_KEY> with your own wallet's private key to be used for deployment.
PRIVATE_KEY is the private key used to deploy contracts.
Writing a contract
Let’s start with a simple contract. FIrst, delete Counter.sol, and Counter.t.sol in contracts/ folder. Also delete Counter.ts and ignition/modules/Counter.ts in test/ folder. Then write a new contract as follows:
// SPDX-License-Identifier: MIT
pragma solidity ^0.8.28;

contract Giwa {
    event HelloGiwa();

    function helloGiwa() public {
        emit HelloGiwa();
    }
}
The smart contract code above is a contract named Giwa, which has a function called helloGiwa and an event named HelloGiwa.
To compile with Hardhat, run:
npx hardhat compileWriting tests
To make sure your contract works as intended, you’ll need to write test code. With Hardhat, you can write tests in Typescript/Javascript using viem, or write unit tests in Solidity. In this example, we’ll use viem.
import { describe, it } from "node:test";

import { network } from "hardhat";

describe("Giwa", async function () {
  const { viem } = await network.connect();

  it("Should emit the HelloGiwa event when calling the helloGiwa() function", async function () {
    const giwa = await viem.deployContract("Giwa");

    await viem.assertions.emit(
      giwa.write.helloGiwa(),
      giwa,
      "HelloGiwa"
    );
  });
});
To run the tests, execute:
npx hardhat testDeploying the contract
Once the smart contract compiles successfully, you can deploy it to the GIWA Sepolia testnet.
One way to deploy contracts with Hardhat is to use a tool called Hardhat Ignition. You can start by writing code as below:
import { buildModule } from "@nomicfoundation/hardhat-ignition/modules";

export default buildModule("GiwaModule", (m) => {
  const giwa = m.contract("Giwa");

  m.call(giwa, "helloGiwa", []);

  return { giwa };
});
When ready, deploy to the GIWA Sepolia testnet with:
npx hardhat ignition deploy ignition/modules/Giwa.ts --network giwaSepoliaIf you see output like the following, your smart contract is deployed on-chain and anyone can interact with it.
Hardhat Ignition 🚀

Resuming existing deployment from ./ignition/deployments/chain-91342

Deploying [ GiwaModule ]

Batch #1
  Executed GiwaModule#Giwa

Batch #2
  Executed GiwaModule#Giwa.helloGiwa

[ GiwaModule ] successfully deployed 🚀

Deployed Addresses

GiwaModule#Giwa - 0x<deployed-contract-address>
Verify and Interact with the contract in the explorer
To interact with your contract through the block explorer, it must first be verified — either by you or someone else.
Take the deployed contract address from above and run:
npx hardhat verify --network giwaSepolia <deployed-contract-address>If you see a response like the one below, you can visit the block explorer to view and interact with your verified code.
=== Blockscout ===

📤 Submitted source code for verification on Giwa Sepolia Explorer:

  contracts/Giwa.sol:Giwa
  Address: <deployed-contract-address>

⏳ Waiting for verification result...


✅ Contract verified successfully on Giwa Sepolia Explorer!

  contracts/Giwa.sol:Giwa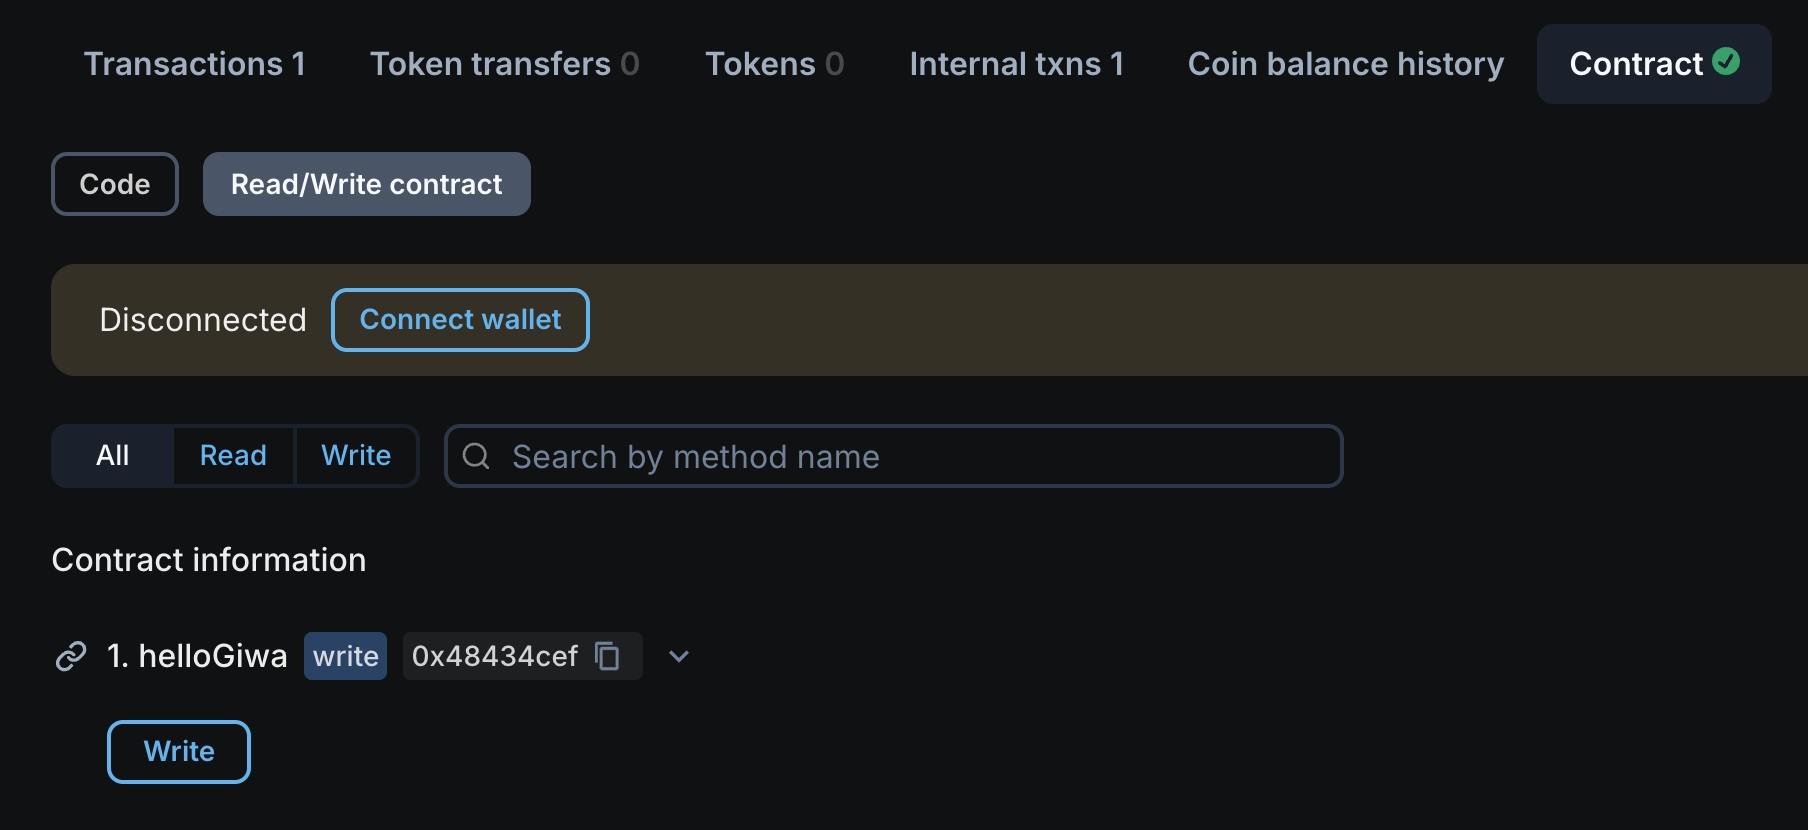
Last updated